What it does
Store Credit (AKA Customer Credit) is similar to a gift card or deposit payments.
What it doesn't do
Once you add Store Credit to a customer you cannot simply remove the credit. The payment attached to the Store Credit either has to be added to another invoice or the payment needs to be deleted.
Table of Contents
- Overview
- Store credit for Customer purchases
- Credit for Invoice Refunds
- Applying Credit to an invoice
- Removing a Credit Balance
- Convert Misc Credits to Store Credit
Overview
There are a few simple ways to create store credit.
- You can make a Customer Purchase and give them credit instead of cash/check/etc.
- You can do a Refund, and credit them with Store Credit.
- You can add Store Credit from a Customer profile page (New > Store Credit), which will not be associated with a transaction.
Customer Purchases
For Customer Purchases, just make sure you have a "Store Credit" payment method, and it's set to behave as Store Credit. To do this,
- Navigate to Admin > Invoices - Payment Methods.
- In the upper right, click New Payment Method.
- Give it a Name, such as Store Credit.
- Click the Payment Type dropdown > Store Credit.
- If desired, check the Require Reference Number box.
- If you use the Xero integration select the Xero account.
- If you use the QuickBooks integration, select the QuickBooks Payment Method.
- Click Save.

Then in the Customer Purchase, you can "pay" them in Store Credit, and it will maintain a balance that is available to use on future invoices.

Invoice Refunds
Invoice Refunds will work similarly—you can pay it out to Store Credit also and it will be available to use in the future.
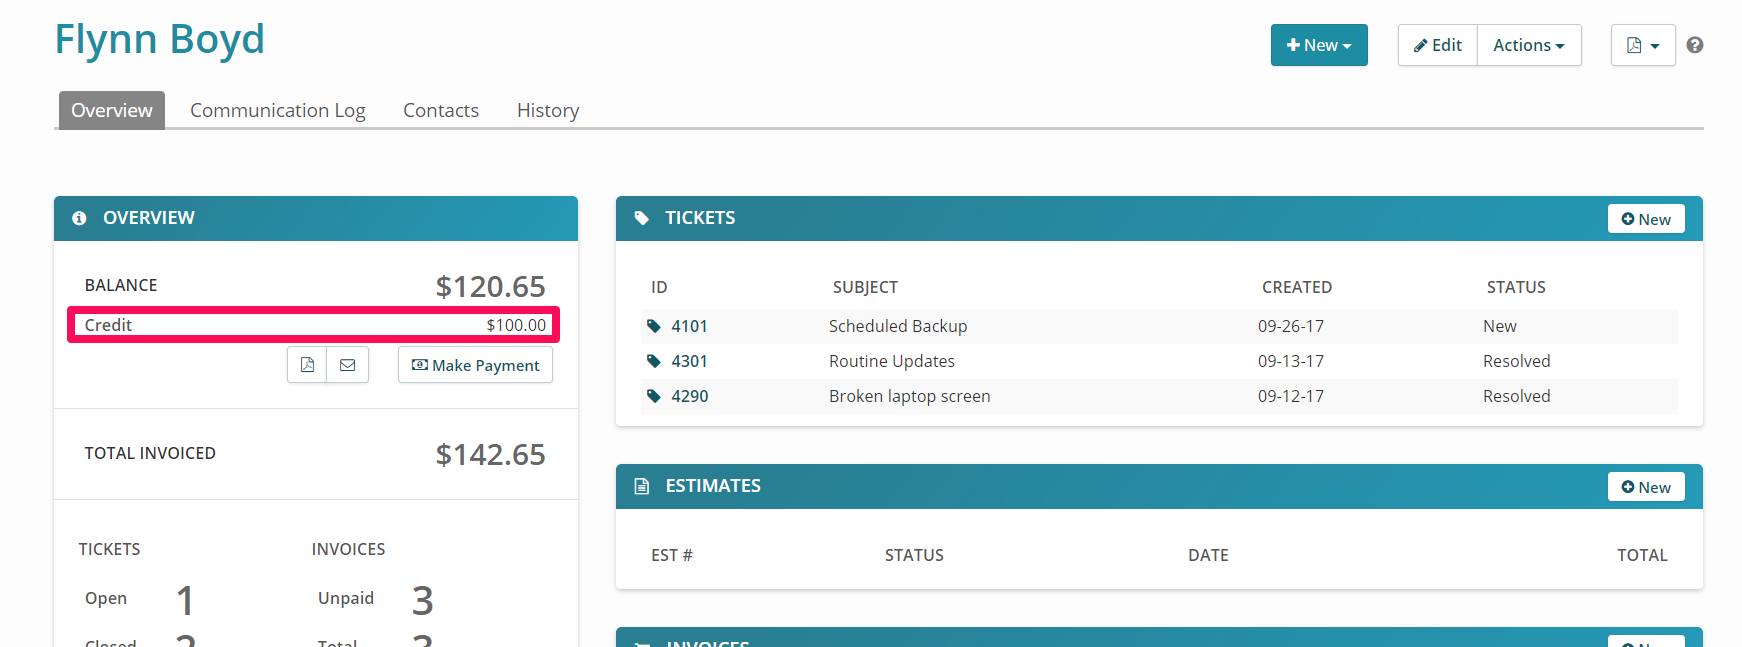
Then you'll see the credit balance on the Customer Detail page like this.

Applying Credit to an invoice
To apply this credit on an Invoice,
- Go to an invoice.
- Click the Take Payment button.
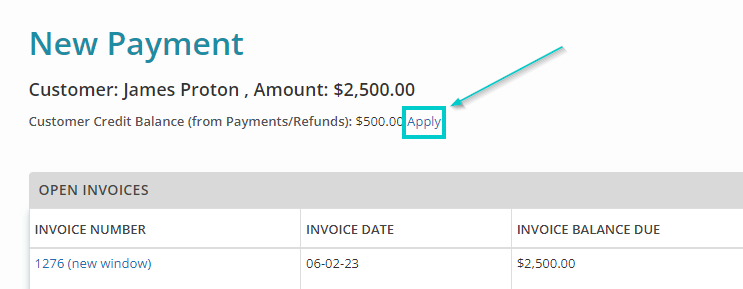
- To the right of the Customer Credit Balance above the payment, click Apply.
- NOTE: It is important that you do not click Take Payment at the bottom of the page on step 3. Make sure to click Apply as shown above. Clicking Take Payment on this step can result in unwanted duplication of store credit.
- Change the Amount to Apply if needed.
- Click Apply Payment.

This payment will then be added to the invoice.

Note that Store Credits are treated like physical gift cards, each with their own separate balances. If there are multiple credits on file for a customer, you’ll need to apply them one at a time.
Removing a Credit Balance
To remove Store Credit, you have to delete the payment that was applied to this customer without an invoice attached to it. All payments can be viewed by going to the customer detail screen and scrolling down to the Payments section. Look for payments that don't have an invoice number attached.
Please note: Any overpayments on invoices would also reflect as Credit, but for this, you would need to go through each invoice and check if an overpayment has been made.

Once you find the payment, click the date by it to open it. Then in the upper right, click Actions > Delete.
Convert Misc Credits to Store Credit
Some of our older User accounts may still have customers with Misc Credits—a feature we deprecated long ago. If this applies to you (run the hidden Miscellaneous Credits report to see if any customers have them—just append /administration/customers_with_misc_credit to the end of your syncromsp.com URL), here is how to convert those Misc Credits into Store Credit.
- Open a customer's profile.
- In the upper right, click Edit.
- In the CUSTOMER SETTINGS section, make note of the amount in the Misc Credits field and delete it.

- In the upper right, click Save Changes.
- In the upper right, click Edit again.
- Right above Misc Credits, click Add Store Credit.
- If needed, click the appropriate register button.
- In the Amount field, type the amount you noted in the Misc Credits field.
- In the Ref num field (which is required), type a reference if you have one, or type something like Transfer misc credit.
- Click Record Store Credit.